Brace yourself, I've got lots of before & afters coming at you....
Funky, right? This chair was sponsored by a really eclectic store that sells unique home furnishings and other oddities collected from across Canada & Europe...I guess that inspires antlers? And sweater-chairs?
Beautiful butterflies! There are two of these beauties, refinished by a colleague of mine, and they're stunners.
These farm stools are pretty awesome - they even spin! I made it so that the 'stamp' can be customized for whoever wins these. They can choose their own letters/numbers to personalize it.
Faux fur throw and Hudson Bay inspired print on the pillow - this chair is sponsored by the New Canadians Centre, obviously!
Not really much to look at when it's 'full frontal' (in buff beige, no less!), but a peek of colour on the back. Surprise! Not so boring after all.
And I can't remember if I shared this "suit-able" chair before...it's covered in a wool suit fabric salvaged from a charity shop in town.
All the chairs are rescues and salvages, most from my trolling on Kijiji (good times!), and then lovingly refurbished. They're auctioned off to support the YMCA Strong Kids Campaign - auction is Saturday night.
Can't wait!
Friday, December 6, 2013
Thursday, December 5, 2013
So you don't know anything about drafting (and that's OK!)
And you don't have Photoshop or any other cool editing program...
Hey, that's OK! Neither do I!
I do all my photo editing using a MS program and created these Farm Table table top designs using MS Word. Sometimes, you don't need the fancy stuff (although I've heard it's nice....real nice).
So the farm table I made using Ana White's plans has been popular, and I have a request for another.
This time I'm offering a couple of options for table top 'layout.' Here they are:

Option A is a little more 'rustic' perhaps, giving the impression of more 'salvaged' wood, while Option B is a bit more 'streamlined.'

They're ready to send off now.
Easy peasy!
Hey, that's OK! Neither do I!
I do all my photo editing using a MS program and created these Farm Table table top designs using MS Word. Sometimes, you don't need the fancy stuff (although I've heard it's nice....real nice).
- The first step was to turn on the 'grid' function so that I had what looks like graph paper (you can find that under 'View'). I also had to change the orientation of my page to landscape, and change the paper size to 11x14 to fit it all in.
- Using the grid lines I went to Insert>Shape and selected a box/rectangle. Then I counted out the size of my pieces of wood...one square = one inch. The light grey rectangles vary in length but are 6" wide.
- I made a bunch of 'wood planks' out of boxes and then I had fun playing around with patterns and designs.
- Make sure you count out the proper sizes by using the grid as a guide! The pieces in option A are 6"x48", 6"x36", 6"x24" the short are 6"x12". You have to count - otherwise you won't know how long your pieces are, or what to cut when you get to that part.
- I added 'nails' by creating teeny tiny circles and then using copy & paste a lot. *Hint* It's easier if you create a row, then 'group' the individual circles, and then copy & paste the rows. You can rotate the rows to get them running in the direction you need (ie: horizontally or vertically).
So the farm table I made using Ana White's plans has been popular, and I have a request for another.
This time I'm offering a couple of options for table top 'layout.' Here they are:
Option A is a little more 'rustic' perhaps, giving the impression of more 'salvaged' wood, while Option B is a bit more 'streamlined.'
They're ready to send off now.
Easy peasy!
Thursday, November 21, 2013
Union Jack Chair - sponsored by the UK Shoppe
Check out this before & after!
She's a beauty! This year's YMCA Chairs for Charity event is keeping me extra busy. I love all the chairs, but gosh, they take a lot of time! Hug an upholsterer today - they deserve it!
My Union Jack chair is made from an old shower curtain (the black & blue stripe fabric), an old velvet shirt (red stripe) and some damask print white fabric. The black fabric is left over from last year's event and is a lovely, thick and heavy, black fabric.
Hours of sewing at my vintage Singer (oh yeah, I finally got a sewing machine that [mostly] works), lots of staples, and all new foam padding inside.
Jolly good!
Oh, and the cute little pillow I also made myself using my trusty Mac-Tac paper-and-paint technique.
Ta-ta for now!
She's a beauty! This year's YMCA Chairs for Charity event is keeping me extra busy. I love all the chairs, but gosh, they take a lot of time! Hug an upholsterer today - they deserve it!
My Union Jack chair is made from an old shower curtain (the black & blue stripe fabric), an old velvet shirt (red stripe) and some damask print white fabric. The black fabric is left over from last year's event and is a lovely, thick and heavy, black fabric.
Hours of sewing at my vintage Singer (oh yeah, I finally got a sewing machine that [mostly] works), lots of staples, and all new foam padding inside.
Jolly good!
Oh, and the cute little pillow I also made myself using my trusty Mac-Tac paper-and-paint technique.
Ta-ta for now!
Thursday, November 14, 2013
2nd Annual YMCA Chairs for Charity Event
Another

The event raises money for the YMCA Strong Kids Campaign which helps to subsidize youth programming for families that need it and kids who want to play!
I have a couple of 'before and after' photos to post for you, and also think you should check out my post on folding upholstery corners since it's still one of my most popular!
Local businesses sponsor chairs (to cover the cost of the refurbishing process) and we create chairs that represent the 'feel' or 'theme' of the business.
For more pictures and sneak peeks into the refurbishing process, visit the Facebook event page.
Sunday, November 10, 2013
DIY: Pine Farm Table
After a loooong hiatus (oh, you noticed that, did you?), I'm back!
We moved, in a bit of a whirlwind affair, back in August and I finally found a workshop space in October and got the keys on November 1st! I'm busy setting up shop now - and getting ready for another custom table order.
Here's the first table I built from scratch.
I used the plans that Ana White offers on her website. She calls it a Farmhouse table and the instructions are amazing! I printed mine out and added inches when I needed to - planning is the most important part! I plotted out all my cuts so I knew what wood I'd need to buy and then I headed to Home Depot to pick up what I needed. Ana's got a whole list of 'materials' as well as 'tools' and even a 'cut list.' Could it be any easier? No, is the answer, in case you were confused.
I assembled the table, filled all the holes, bashed it up with a hammer, and sanded the heck out of it! I stained the top with two different colour stains - Minwax's Espresso and American Walnut. The final finish for the table top was about 5 coats of Varathane Diamond Floor Finish.
On a sad note, or biggest little lady, Olive, went missing on October 26th. She hasn't turned up and we miss her every day. When we adopted the kittens, 'Miss Thing,' as we sometimes called her, was a fantastic mother. She had so much love in her little heart, and we hope someone else might be sharing it with her today...if not, we know she lived a life full of love (and lots of cuddles!)
Olive can best be remembered as needing to have everything 'just so,' and demanding to have her belly rubbed with her signature 'stretch and roll' move, at least twice, daily.
We miss you, Olive-branch.
Monday, July 29, 2013
DIY Subway Art Coffee Table Set
This table set turned out just as I'd imagined!
OK...I'd like to recommend you try this at home, but I've got to say....only try it at home if you have a) loads of free time or b) a Cricut or Silhouette or similar type machine. I'm not blessed with one of those fancy machines so I do everything by hand. I use lots of Contact/Mac Tac paper (the kind you can get at the Dollar Store for lining shelves or covering books) and teeny tiny nail scissors (or sewing scissors - even better!) And I have a really steady hand. If I'd had higher aspirations, I guess I should have been a surgeon. In my next life. You can read about how to create your own stencils when I used them on burlap pillows or my reproduction coffee sack chair.
I've had a crush on subway art dressers and plaques for a while and wanted to use the style on another piece of furniture, so this little set fit the bill.
I live in Peterborough, Ontario, Canada and decided to make a word map based on our city. I love it! At first I wasn't sure if it was worth the effort, but when I sanded and distressed the lettering I knew it would work out as I imagined (trust me, sometimes it doesn't!).
I'd love to sell these tables as a set, but I already have someone interested in the coffee table (seriously, minutes after I posted it for sale!), so I'm happy to sell the separately.
Friday, July 12, 2013
Make room for something new
I finally pulled it together to clean out my garage last Sunday. I've been putting it off since the spring. You'd be amazed at the creative excuses I could come up with to avoid it!
At any rate, it was getting out of control, and I have a custom order for a harvest table to work on, and it would no longer fit in the sunroom. So, I bought a new lock for the shed, moved the bicycles out of the garage into the shed, and then started moving furniture and stacking wood!
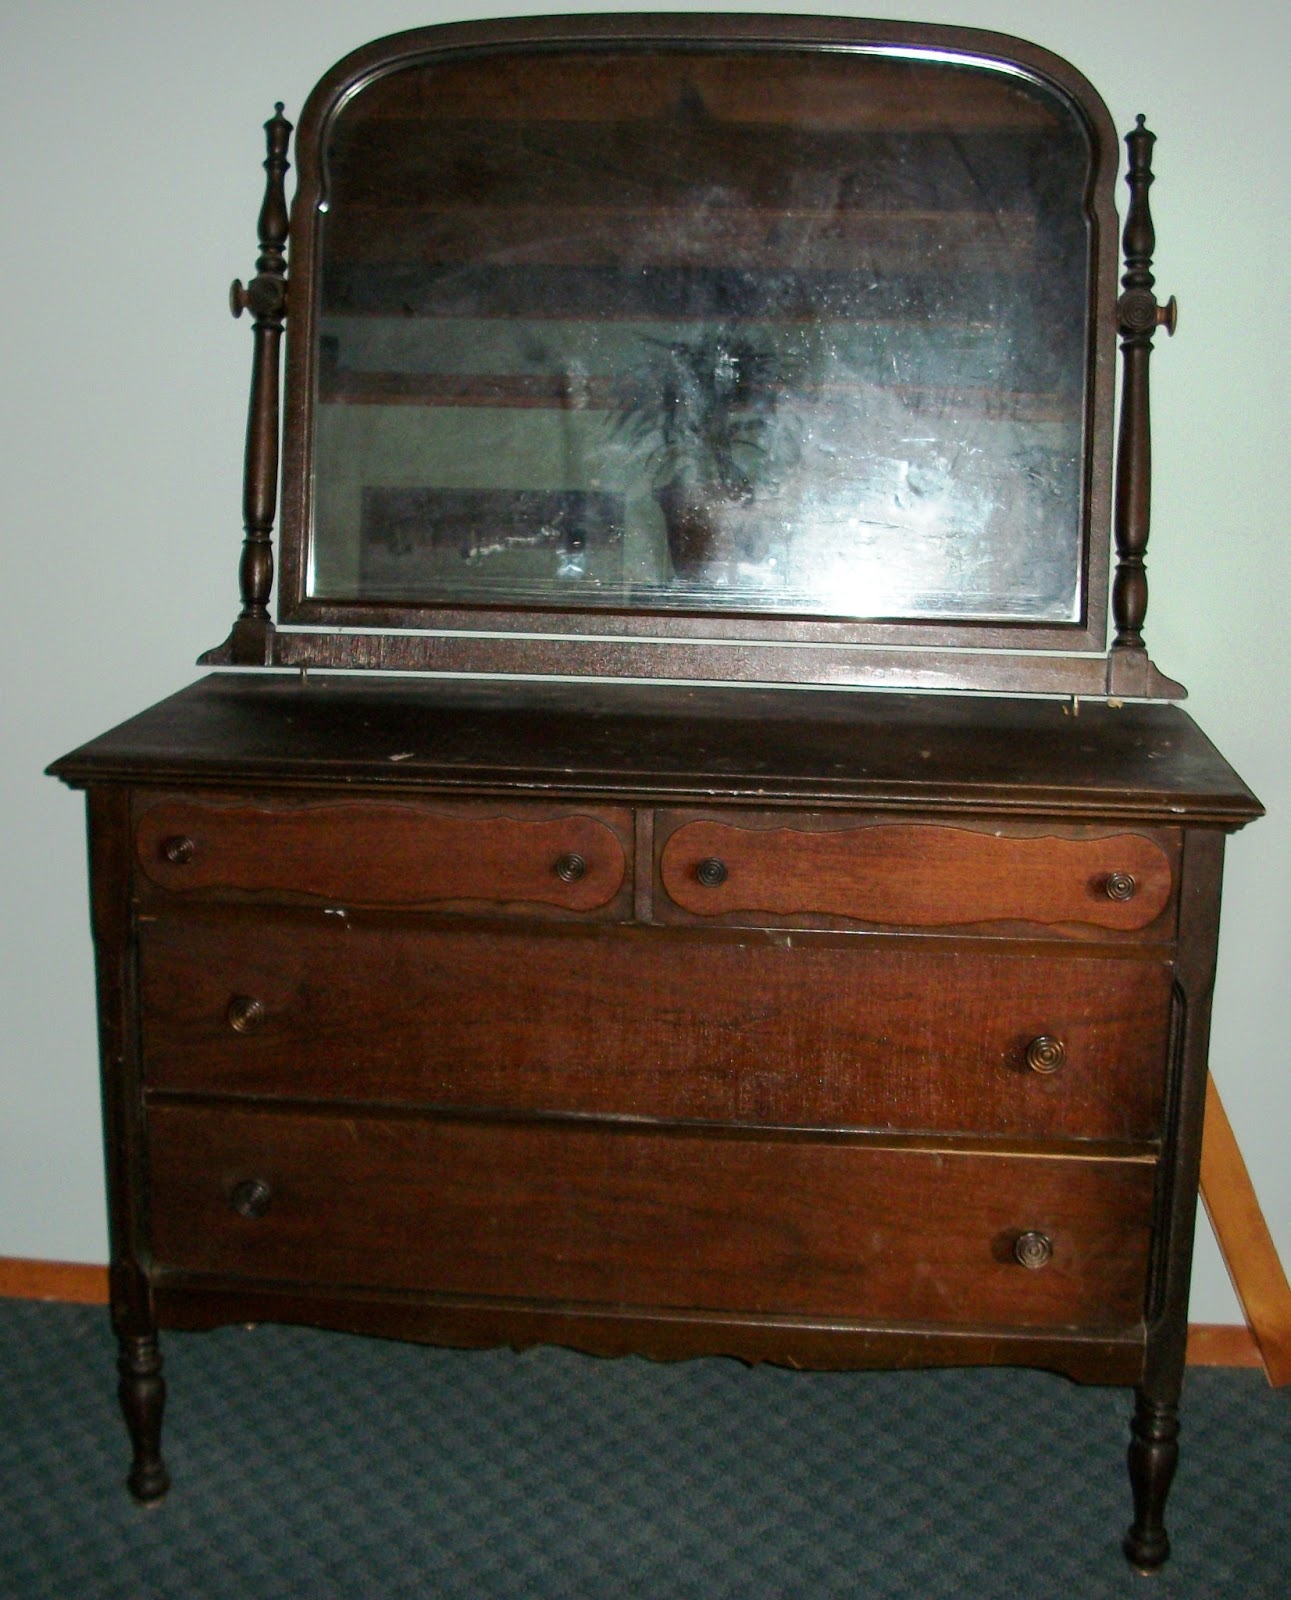
First, I moved this amazing bureau I got for free a few months ago:
I can't wait until I have a chance to work on it. I've fixed some of the inner workings already - it needed a new drawer slide so I cobbled one together from some scrap wood. I still need to plane the drawers a bit...and then painting! Any colour suggestions?

Then I got some help to move this huge vintage cabinet into the house.
I work from home and have been storing my work equipment and folders in an old plastic tote.
This is a much better solution!
I finished the coats of paint after it was moved inside (although most of them had been done in the garage), sprayed the long mirror (which has smoked over the years) with blackboard paint.
"I couldn't possibly clean the garage, it's going to be dark in three hours!"
"15 degrees is still too cold to clean out the garage. It's freezing!"
"Right after I finish Season 2 of 'Game of Thrones.'"
At any rate, it was getting out of control, and I have a custom order for a harvest table to work on, and it would no longer fit in the sunroom. So, I bought a new lock for the shed, moved the bicycles out of the garage into the shed, and then started moving furniture and stacking wood!
First, I moved this amazing bureau I got for free a few months ago:
Then I got some help to move this huge vintage cabinet into the house.
I work from home and have been storing my work equipment and folders in an old plastic tote.
This is a much better solution!
Originally, I wanted to make this into a '50 Shades of Grey' cabinet, but I stalled out on it in the Fall and then the winter hit....and I was living in a landscape of shades of grey and wasn't inspired to finish it (plus it was freezing in the garage in minus 20 degrees!).
I finished the coats of paint after it was moved inside (although most of them had been done in the garage), sprayed the long mirror (which has smoked over the years) with blackboard paint.
I still need to do something with the smaller square mirror, but maybe I'll leave that to another season!
I've collected quite a stash of scrap lumber on pallet wood and was finally able to finish these signs for a wedding later in August. Just making things happen and getting things done!
And if you're looking for a unique, ultra feminine dresser and bedside table set, I've got what you need! These lovely pieces are for sale for $295 (for the set).

Subscribe to:
Posts (Atom)