Monday, July 29, 2013

DIY Subway Art Coffee Table Set

This table set turned out just as I'd imagined!

OK...I'd like to recommend you try this at home, but I've got to say....only try it at home if you have a) loads of free time or b) a Cricut or Silhouette or similar type machine.  I'm not blessed with one of those fancy machines so I do everything by hand.  I use lots of Contact/Mac Tac paper (the kind you can get at the Dollar Store for lining shelves or covering books) and teeny tiny nail scissors (or sewing scissors - even better!)  And I have a really steady hand.  If I'd had higher aspirations, I guess I should have been a surgeon.  In my next life.  You can read about how to create your own stencils when I used them on burlap pillows or my reproduction coffee sack chair


I've had a crush on subway art dressers and plaques for a while and wanted to use the style on another piece of furniture, so this little set fit the bill. 


I live in Peterborough, Ontario, Canada and decided to make a word map based on our city.  I love it!  At first I wasn't sure if it was worth the effort, but when I sanded and distressed the lettering I knew it would work out as I imagined (trust me, sometimes it doesn't!).


I'd love to sell these tables as a set, but I already have someone interested in the coffee table (seriously, minutes after I posted it for sale!), so I'm happy to sell the separately. 


The two end tables are $65 each, or $120 for both.  Get 'em while you can! 

I'm linking up here:
  Madcap Frenzy

Friday, July 12, 2013

Make room for something new

I finally pulled it together to clean out my garage last Sunday.  I've been putting it off since the spring.  You'd be amazed at the creative excuses I could come up with to avoid it! 

"I couldn't possibly clean the garage, it's going to be dark in three hours!"
"15 degrees is still too cold to clean out the garage.  It's freezing!"
"Right after I finish Season 2 of 'Game of Thrones.'"

At any rate, it was getting out of control, and I have a custom order for a harvest table to work on, and it would no longer fit in the sunroom.  So, I bought a new lock for the shed, moved the bicycles out of the garage into the shed, and then started moving furniture and stacking wood! 

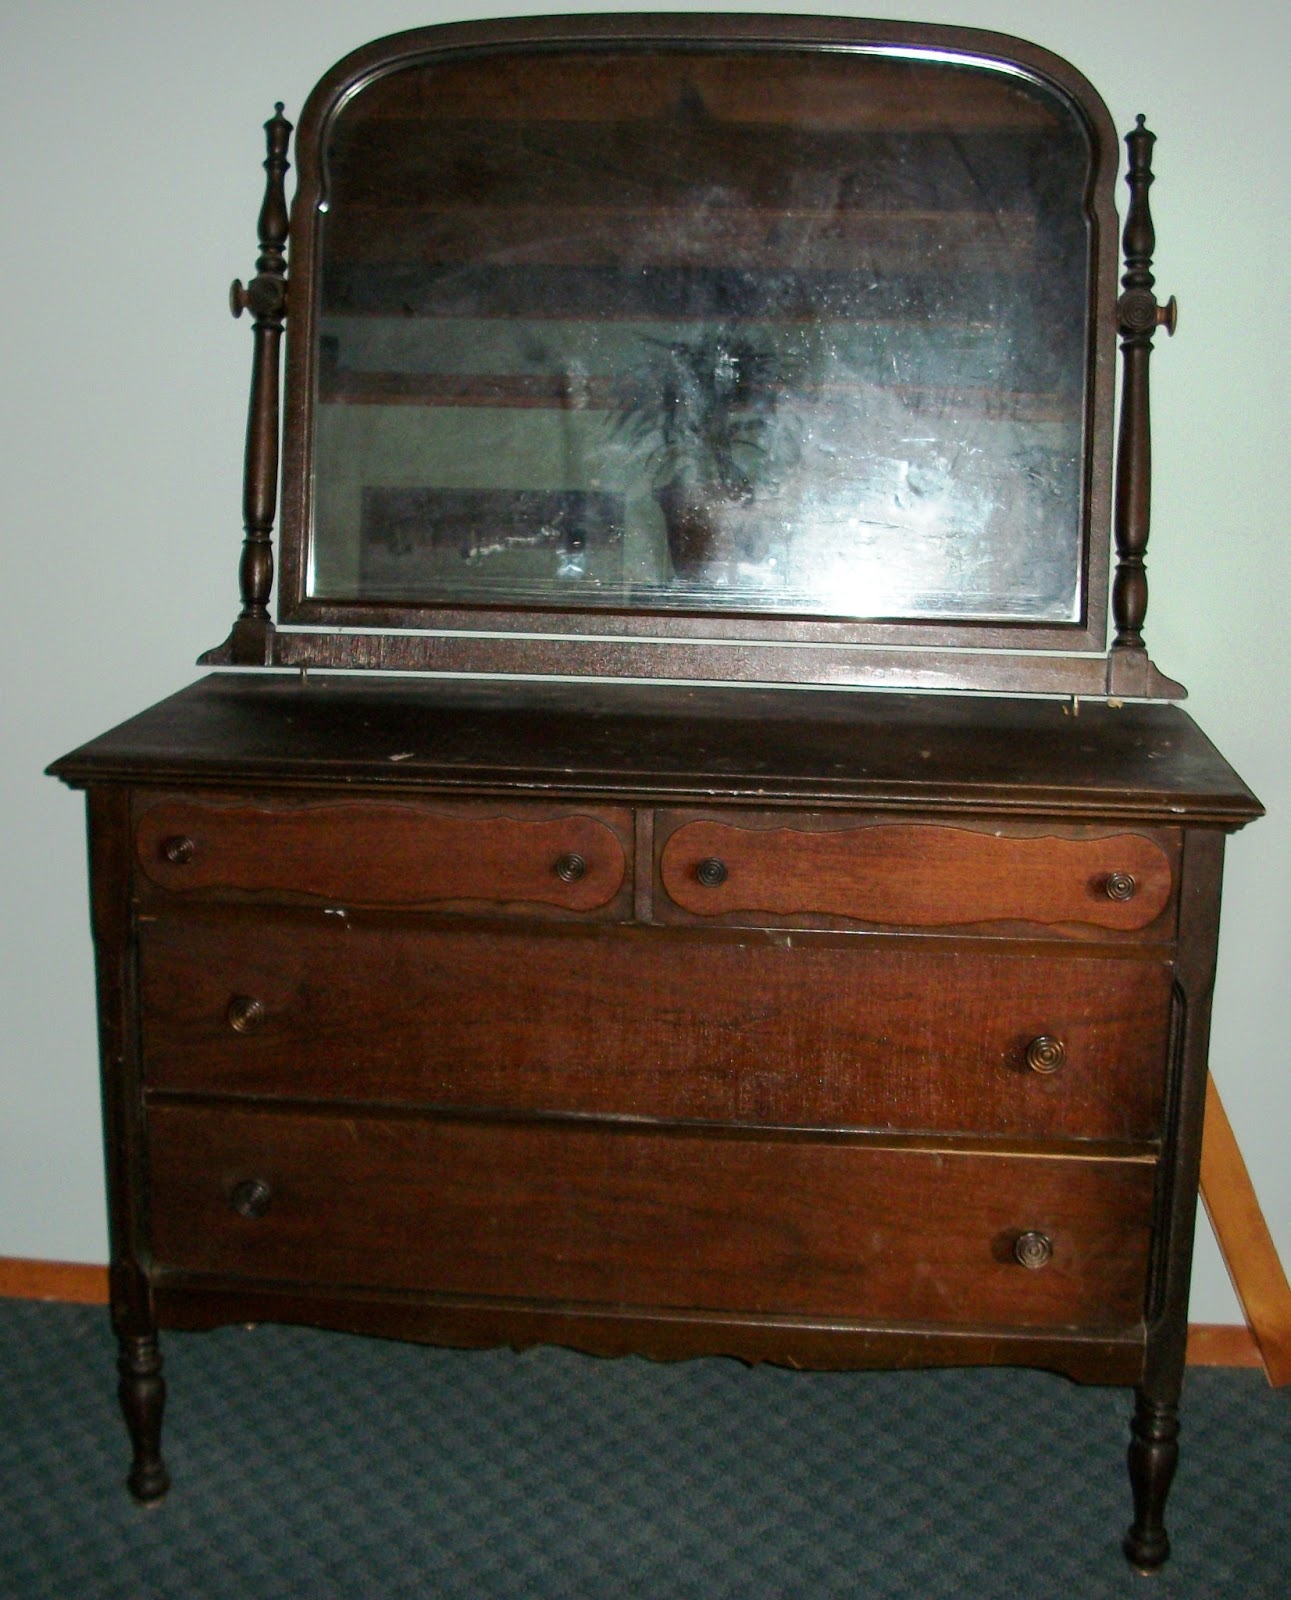
First, I moved this amazing bureau I got for free a few months ago:

 
I can't wait until I have a chance to work on it.  I've fixed some of the inner workings already - it needed a new drawer slide so I cobbled one together from some scrap wood.  I still need to plane the drawers a bit...and then painting!  Any colour suggestions?
 

Then I got some help to move this huge vintage cabinet into the house.

I work from home and have been storing my work equipment and folders in an old plastic tote. 

This is a much better solution!


Originally, I wanted to make this into a '50 Shades of Grey' cabinet, but I stalled out on it in the Fall and then the winter hit....and I was living in a landscape of shades of grey and wasn't inspired to finish it (plus it was freezing in the garage in minus 20 degrees!). 


I finished the coats of paint after it was moved inside (although most of them had been done in the garage), sprayed the long mirror (which has smoked over the years) with blackboard paint. 

 
I still need to do something with the smaller square mirror, but maybe I'll leave that to another season!


I've collected quite a stash of scrap lumber on pallet wood and was finally able to finish these signs for a wedding later in August.  Just making things happen and getting things done!


And if you're looking for a unique, ultra feminine dresser and bedside table set, I've got what you need!  These lovely pieces are for sale for $295 (for the set).  


Sunday, June 2, 2013

Vins et Spiriteux Set

I worked on a custom order a week ago.  The end of the story is fantastic, the middle....not so much.  It started out strong...I refinished a long coffee table and two side tables, sanded the tops, restained the wood, and drew the 'Vins et Spiriteux' graphic on the coffee table, and sealed everything with durable Varathane floor finish. 


Parfait!

Then I was asked to do a similar treatment to a pine desk and a 50s magazine holder.  The desk is where things started heading south.  I thought I'd strip the top and sand away some of the uneven paint on the legs of the desk and that would be the end of the story.  Not so. 


I should have sanded EV-ER-Y-THING down right from the get-go.  I have no idea why I didn't.  So, in a make-work project for myself, I finished the desk...but it wasn't right!  It looked pretty awful (or at least not as good as it could) and in the end I had to pull it all back to the pine.  I went through a lot of sandpaper. 

In the end...she's a beauty! 


The [very patient] customer was happy...she said this:
   
Emily, thank you so much for the lovely job you did on my "garage sale" find! 
We have received many compliments on the desk and are very happy with it.  I
 will be sure to recommend you to others.    Mary Lou R. (Ennismore, ON)

Ain't that grand?!

And here's where she's sitting pretty now


Au revoir!

Monday, May 13, 2013

Vintage Grain Sack and Antique Enamel-Inspired Nesting Tables

I didn't get a chance to blog about these gorgeous, adorable  (gorgable? adorgeous?), tables before they sold.  I absolutely love how they turned out - just like vintage grain sacks and aged enamel washbasins rolled into one! 


The pictures below are what the tables looked like before I finished them - a little distressing and some ubber-durable floor finish to seal everything in. 


And as I said, they're 'nesting' tables...so I'll leave you with a shot of everything pulled together!

Thursday, May 2, 2013

Land of the Silver Birch: Entranceway Set

I had a Queen Anne style table hanging around in the garage since last October when I was collecting chairs (and tables, apparently) for the YMCA Chairs for Charity event.  I didn't have any chairs to match (they were used for the charity event!) so I held on to this table for a while...

A week ago it hit me - I can separate the table top and use each half for a different project!  Duh!

Separating the tables was super-easy, just a few screws to loosen and remove et voila!  The table skirt came off with a couple of whacks from my mallet, and we were in business. 


I primed the table half (and I really should have primed it in white, not grey....but I wasn't thinking), and then painted two coats of off-white latex paint over top.  After these dried, I set about painting over the base coat with the blue-grey paint, and creating the birch-tree effect. 

Painting a string of birch trees is easy - I free handed the trees in, painted the 'background' behind the trees with the blue-grey colour and left the tree trunks white.  To create the bark effect, use your blue-grey paint and paint in lines of various lengths in random locations along both sides of the trunk.  Easy!

I sealed the paint after I was finished and then I used an awl and hammer to tap in the nickel-plated upholstery nails one-by-one.  Once I got the hang of it, it actually didn't take as long as I expected.  The final touch was adding the coat hooks and the chalkboard banner at the bottom.  Too cute! 


For the bench, I gave it a couple coats of off-white chalk paint and bought some 1-inch thick foam to pad the top.  Once upon a time this bench was a coffee table.  *gasp!*  (OK, it's not rocket science but it's the first time I've done it).  I stapled down a double-thick layer of batting over the foam to give everything a nice smooth feel.  I stapled down the fabric, pulling it as taut as I could as I went. 


Then I repeated the same technique I used on the coat rack to paint the birch trees on the fabric of the bench.  I used latex paint and after it had dried overnight, I used medium grit sandpaper to soften and distress the fabric.  The fabric doesn't feel like cotton anymore, but more like outdoor-furniture fabric.  Perfect for a busy mudroom or entranceway.  It wipes clean and resists water!

The coat rack is meant to hang on the wall above the bench if it were in a mudroom or entranceway.  You could put this in the bedroom, too and have the bench at the foot of the bed and the coat rack could be used to hold hand-bags, belts, scarves and even jewellery! 


This set is for sale ***$150*** and it's yours! 
 
I'm also sharing this upcycled project over at Fingerprints on the Fridge
Check it, and lots of other cool projects, out here:

Monday, April 22, 2013

Easy Art - World Map Mirror

I picked up TWO of these framed mirrors at an estate auction for a price so low, I can't publish it here, because it will make too many readers jealous!

This project was quick and easy and used a lot of tried-and-true techniques I've picked up over the years. 

For a time I used to make my own tumbler glasses out of recycled Perrier (or comparable No Name brand) bottles.  The process to cut the glass and grind down the lip of the glass is complicated, and not what this post is about (plus I don't have process pictures)....so skip ahead to the part where I etch the glasses using acid etching cream. 


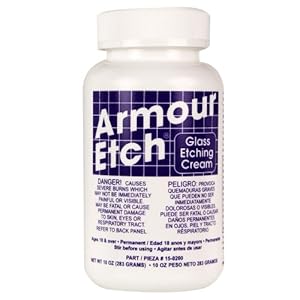
I use Armour Etch, but there are other brands out there, too.  I buy mine off of Ebay usually since I can get a better deal.  I loves me some deals! 

The technique I use is simple - and is similar to how I stencil my pillows. I find a design or image I like, often I blow it up using Block Posters, and I print it out.  Then I glue the image on to Mac Tac or contact paper and use nail or embroidery scissors to cut out the design. 


If it's a large image, be very careful applying the contact paper.  Apply it in sections and be certain to push out any air bubbles.  Sometimes I have to cut a slit or seam in the contact paper as it can stretch a little during application.  I'll do this so I can get most of the image lined up properly, and then fill in the gap that might be left with a small piece of contact paper. 

Be sure to really rub down around the edges of the image - you can use a credit card.  Or if you're me, you use your nail (or perhaps, more accurately, stubby nail nubbin). 

I didn't snap a picture of the acid cream application.  You can image it though; the cream has a consistency like toothpaste and can also be spread with an old credit card.  A great bonus: acid cream is reuseable!  So, coat your image with a thick, even, layer, let sit for 20-30 mins., and then scrape off using the credit card and return it to the tub!  How's that for value-for-money?  After you remove the acid cream, you'll want to wipe it down with water and an old rag.  Warning: do not get the acid cream on any other surface than the one you want etched - it WILL mark any other glass surface it come in contact with, even for a minute! 


Here's a peek at the mirror in process.  I'm removing the contact paper after having removed the acid cream.  Nice crisp lines!


Polish the mirror and you're finished!  A functional art piece for your bedroom, office or to create interest in the hallway.  You can use acid etching cream on any glass surface - try it!  You can make all kids of neat and inexpensive gifts. 


Sunday, April 21, 2013

French Shabby Chic Tables - Hot Stuff!

Here's a quick before and after to share with you - this table is already sold.  In fact, it sold the day I posted it for sale.  These coffee tables are always extremely popular - I can't make them fast enough!  Perfect!


They all start out the same....solid, curvy, and dated.


But they all end up a little differently...


I especially like the "Queen Bee" graphic in the centre (as always, graphics from 'The Graphics Fairy!'  Google her - she is a goddess!)


Short and sweet - just like this ol' coffee table!  I'll bid her 'au revoir' tomorrow afternoon.  *sob* 
 
I'm sharing this table makeover at The Graphics Fairy.  You should bibbity-bobbity-boo yourself over there and check out the hundred (thousands?) of vintage graphics she has to download!